Spark Gap Tesla Coil (2020)
Partway through making DRSSTC 1, I got very frustrated and decided to pursue a different project for a short while. I decided to build a spark gap Tesla Coil, since I figured it would be much easier. I based my design off of Greg Hunter's design. I made several improvements to the winding rig I had, allowing me to wind a new secondary without speedbumps.
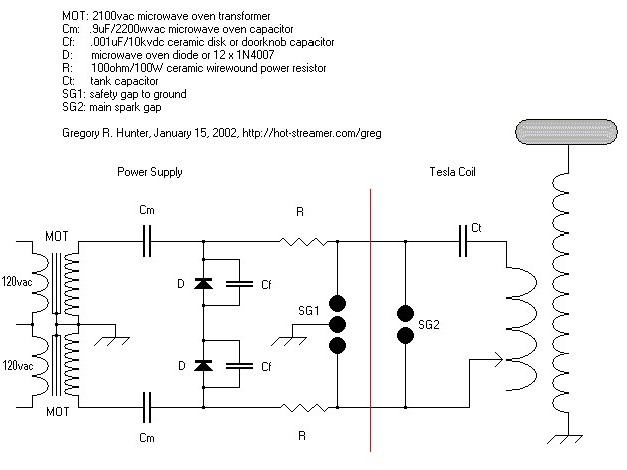
An idea came to me about Tesla coils. I knew that for ones utilizing spark gaps, a large step-up transformer would be needed to generate a spark. Most people go with neon sign transformers, but they are expensive and fragile. I had an idea about using a microwave oven transformer (MOT) instead, and upon doing a bit of research, I found this schematic designed by Greg Hunter. These transformers are easy to find; most scrapped microwaves have functional high voltage capacitors and transformers.
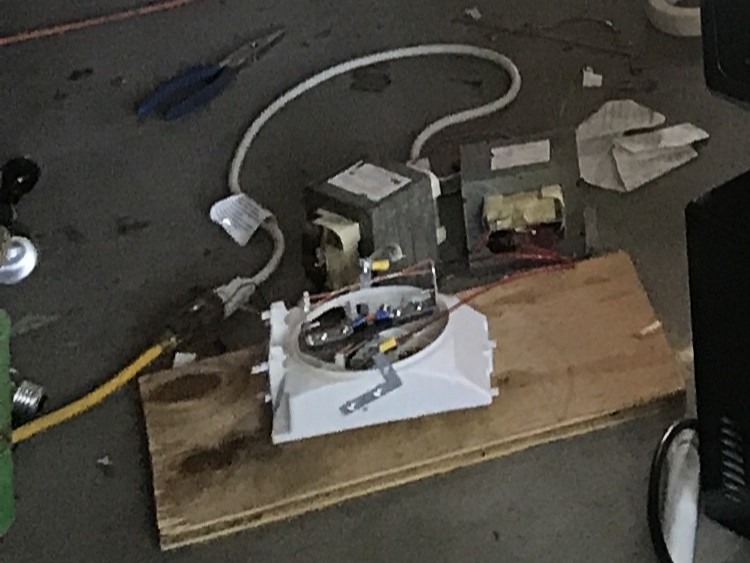
I started scavenging for used microwaves. I bought two or three for around 10 bucks each and found a few which were going to be thrown out. As soon as I got my hands on my first microwave, I couldn't help but play around with the transformer. This is a Jacob's Ladder I put together. I triggered each "ascension" with a "chicken stick," aka a very long piece of PVC with something metal on the end. MOTs can provide hundreds of milliamps at more than 2,000 volts, so I was sure to stay well away. One scary thing I found out is that concrete is conductive! One end of the secondary winding on the MOT is connected to the ferrite core. Placing the transformer on concrete and touching the other end of the secondary somewhere else on the ground produced an arc! These are scarily powerful.
I used JavaTC to design the rest of the parameters of the coil. Fast forward to when I was done building, and the numbers that JavaTC gave me were spot on.
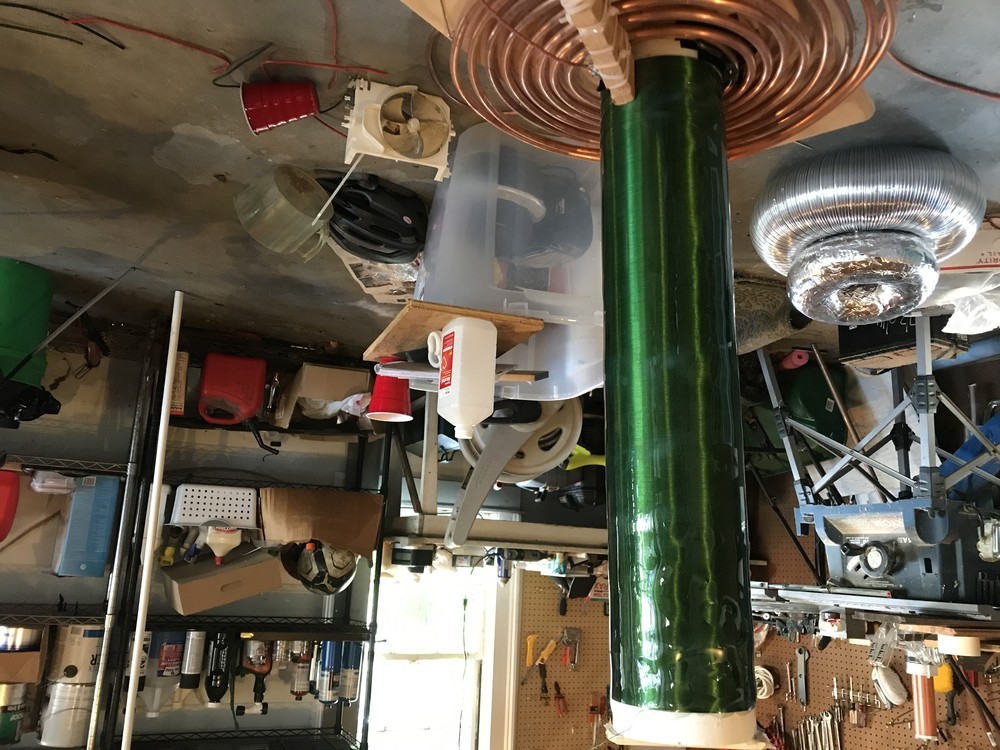
I wound the secondary on a 4.5" OD PVC pipe at 22" long with 26 AWG green magnet wire. I gave the winding rig an upgrade, and it was much more rugged. Additionally, I learned my lesson from using varnish on DRSSTC 1, and coated it with epoxy.
The first primary I made was a vertical spiral, but it arced directly to the secondary, so I changed it to be flat.
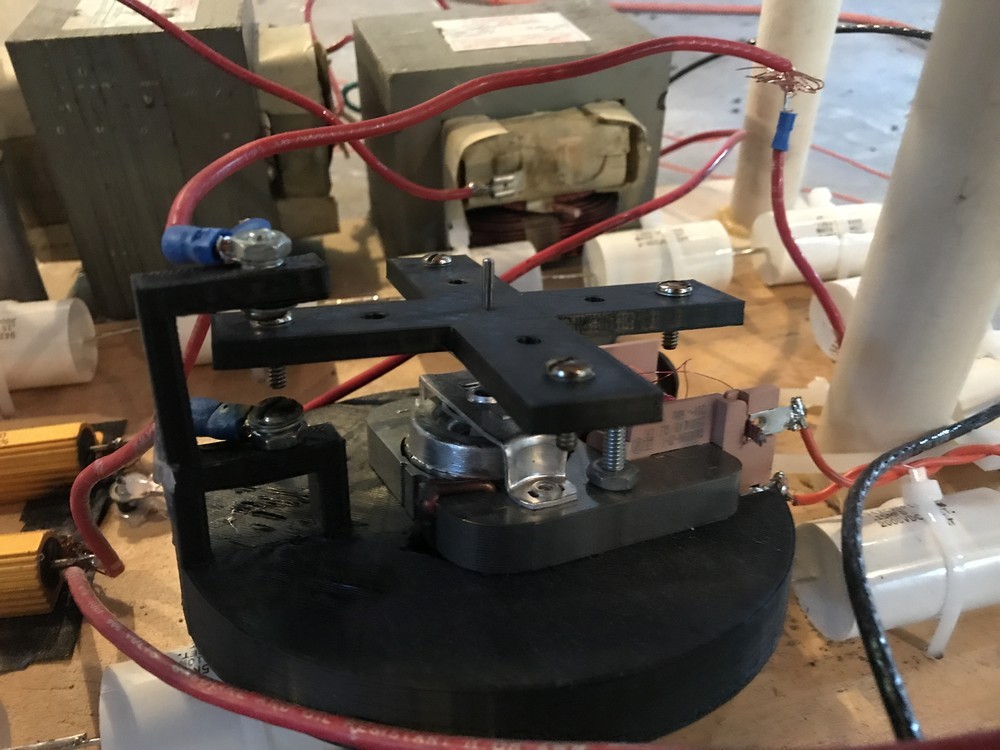
I made a few changes to the spark gap as well. I originally had a stationary gap, but it was hard to tune right and overheated very quickly. I then switched to a rotary gap, which worked much better. It was an improvement, but still not perfect, so I 3D printed a new one, which uses the fan motor from one of the frankensteined microwaves. It's better, but I'm still running into issues with overheating and the PLA melting.
Static Spark Gap
ARSG with old toroid
ARSG with new toroid